Showing posts with label how to. Show all posts

January 29, 2014

Easy Quinoa with 5 Veggies for Slow Cooker

Easy Quinoa with 5 Veggies for Slow Cooker


Ingredients:

1 ½ cups quinoa, rinsed unless you buy quinoa that has already been rinsed
½ cup brown rice, uncooked
6 cups chicken bouillon or chicken broth - I use Wyler’s Instant Bouillon (Chicken), which comes in cubes or granules
2 cups of “Seasoning Blend” by “Fresh Frozen” – purchased in a bag in frozen section of grocery store (includes chopped onions, green peppers, red peppers, and celery).  Any frozen pepper blend will probably be just fine.
2 cups frozen chopped spinach – purchased in a bag in frozen section of grocery store
1 TBS dried basil
½ tsp. pepper
½ tsp. garlic powder
1 TBS olive oil


Prior to creating this recipe, most of the quinoa dishes I had ever eaten were cold and were of the rabbit food variety.   You know… cucumbers, tomatoes, etc. 
This, on the other hand, is a real stick-to-your-ribs quinoa dish.  It is served hot and reminds me of my mother’s homemade turkey stuffing.  It’s WAY healthier, though.  If you haven’t already heard about the health benefits of this Supergrain of the Future (quinoa) then, well, you just really need to read Pinterest more often.


Bob’s Red Mill Quinoa is the brand of quinoa that I buy.  According to the label, it has already been rinsed and air-dried.  I have never rinsed mine and it is always delicious.  At first I didn’t know that after you buy it, you are supposed to keep the bag of quinoa in your fridge or freezer so it will stay fresh longer!

The 5 veggies are: onion, green pepper, red pepper, celery, and spinach

The other ingredients 
Spray slow cooker with cooking spray.
Bring 6 cups of water to a boil.   Dissolve the chicken bouillon cubes or granules in boiling water according to directions on label.  You can use canned chicken broth if you would like.
Put all ingredients in the slow cooker and stir.  The quinoa will sink to the bottom.


This is what it looks like before you cook it.

Cover and cook on LOW for 3.5 hours.  Stir/fluff.  Makes 10-12 servings.  

On the left: after cooking but before stirring
On the right: after stirring

My nephew Hunter piling it on his plate because it is DELICIOUS!   … and did I say HEALTHY?!
My inspiration for this recipe came from a recipe by Amanda from Moms with Crockpots.  For her recipe, you chop green beans, a carrot, etc.  My recipe needed a lot more liquid and cooks on Low for a shorter time so that the food doesn’t stick to the sides and bottom of the slow cooker.  I used the word “Easy” because by using frozen vegetables, there is no slicing and dicing… less preparation time.

The next time I have leftovers of this dish, I plan to add more chicken broth and turn the leftovers into quinoa/veggie soup!

Enjoy!

PRINTABLE VERSION: Link to printable version of recipe on one page:

https://drive.google.com/file/d/0B7BIf1kqh0WkdXhHeU1kTlZteEk/edit?usp=sharing

...and that's my 2 cents' worth, Cheryl

To subscribe to this blog (receive e-mail notification when there is a new post), e-mail Cheryls2CentsWorth@gmail.com and write “Subscribe” in the Subject line. Thanks! To stop receiving e-mail notifications, write “Unsubscribe” in the Subject line.

“Like" my Facebook Page by clicking this link and then clicking the "Like" button:   http://www.facebook.com/Cheryls2CentsWorth


Home page of my blog:  http://www.Cheryls2CentsWorth.blogspot.com


November 26, 2013

Fall Tablescape II Using Spray-Painted Magnolia

Fall Tablescape II Using Spray-Painted Magnolia


After using these magnolia cuttings on a luncheon table while they were green, I let them dry out, spray-painted them gold, and used them again for a dinner party in November! 

Cut off the leaves that are facing down

Magnolia leaves have two sides.  The side that was green takes spray paint very well!  The back side does NOT, so I just left the brown back sides alone.  The first thing I did was cut off the magnolia leaves that were facing down.  

Then I spray painted the remaining leaves. 

I bought these at Hobby Lobby

I found these fake/replica berry stems at Hobby Lobby.  I used the brown and cream ones for this arrangement.  Can’t wait to use the red ones next month.


I bought this cluster of crystallized fruit so long ago that I don’t remember where I got it… probably somewhere like Country Boys.  After setting the fruit into my gold bowl, I used Spanish moss to “pretty-it-up”.  My “go-to” Problem Solver is Spanish moss!  It fills in cracks and covers anything that is ugly.


I placed the berry stems and a fern stem as shown and did that on each side since my table is rectangular.  

I then used the painted magnolia cuttings to put at the base of the bowl
and cover the bare part of the stems.


After I told my sister Jill that I could add little pine cones or acorns if I had some, she insisted that I borrow some acorns that she had just purchased from A“door”able Creations by Debbie. 


Finished arrangement
Enjoy the holidays!

...and that's my 2 cents' worth, Cheryl

To subscribe to this blog (receive e-mail notification when there is a new post), e-mail Cheryls2CentsWorth@gmail.com and write “Subscribe” in the Subject line. Thanks! To stop receiving e-mail notifications, write “Unsubscribe” in the Subject line.

“Like" my Facebook Page by clicking this link and then clicking the "Like" button:   http://www.facebook.com/Cheryls2CentsWorth

If you enjoyed this article, you might also enjoy seeing photos of the table in which I used the fresh magnolia: http://cheryls2centsworth.blogspot.com/2013/10/fall-tablescape-using-spray-painted.html


Home page of my blog:  http://www.Cheryls2CentsWorth.blogspot.com


October 29, 2013

Fall Tablescape Using Magnolia and Spray-Painted Hydrangeas

Fall Tablescape Using Magnolia and Spray-Painted Hydrangeas
 
Fall Tablescape
It’s fall.  The mornings and evenings are cool and the days are beautiful.  The stores place their Halloween candy strategically where you pass it a hundred times as you walk down the aisles.   Butterfingers!  Aghhhh.

My friend Valerie had a big birthday recently, so some friends and I had a surprise luncheon for her.  For the table, I had picked up some artificial, mini pumpkins/gourds.  They looked so real that the lady in the checkout line behind me asked me if they were real or not.  Now that’s a good fake.  I also picked up some burlap garland because HELLO – burlap is IN.  I found some glittery leaves … and what girl doesn’t appreciate a little bit of bling?
Fake gourds, Burlap Garland, Glittery Leaves


I also stumbled upon CARVABLE, fake pumpkins and picked up one of those.


Ironically, it is my friend Valerie who told me that almost every year, she lets her hydrangeas dry on the plants, cuts the stems, spray paints them gold and silver, and decorates her house and table with them. 

Most of my hydrangeas weren’t dry enough at the end of September, so I cut them and dried them on my porch.  I have a great piece of furniture for drying flowers… all I need are clothespins!

Drying hydrangeas on my porch


When spray-painting the limelight hydrangeas, I purposely didn’t cover every square inch because it gives them more texture and you can tell they are real flowers.
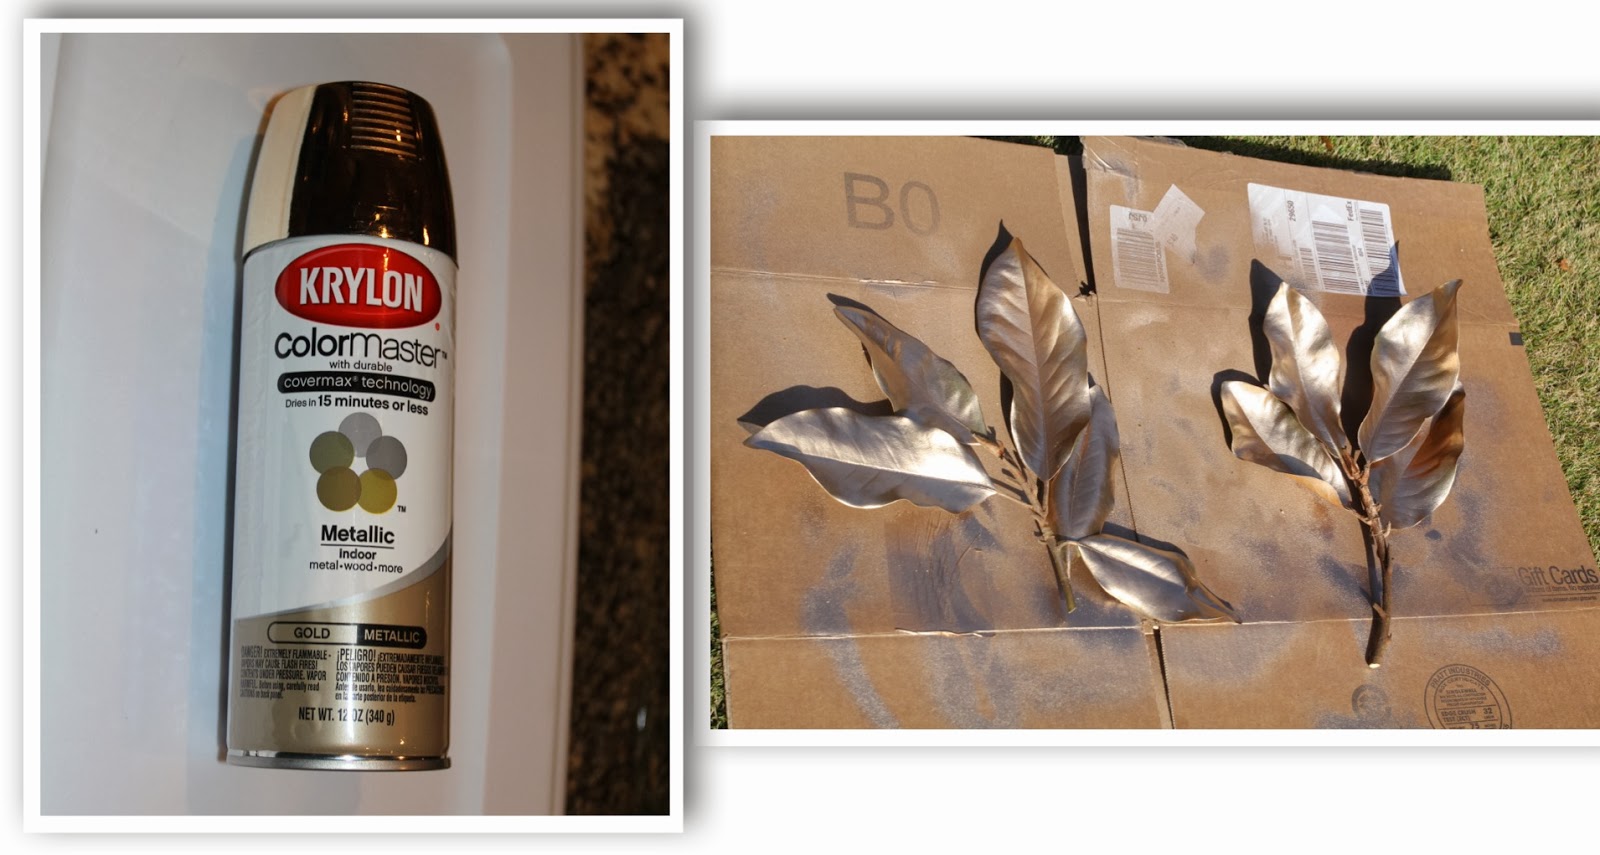
I used Krylon ColorMaster Gold, Metallic Spray Paint (WalMart)


I cut a hole (the size of an old glass of mine) in the top of the carvable pumpkin.  I use the word carvable very loosely, because I will be honest – this thing was hard to cut.  Even using one of my new, colorful, sharp knives that I bought on sale from Costco recently, it was HARD.  I stuck the old glass in the hole, glued it in, and then I glued Spanish moss around the edge.  In the future, I can use this for real flowers with water.


It helps to have a sister like Jill who brings magnolia leaves that she has cut from her yard OR from the entrance to her neighborhood...  mum’s the word… what the HOA doesn’t know won’t hurt them…  Jill cut the magnolia so that there were about 6-10 leaves per cluster.
Sweet sister Jill

After putting the magnolia on the table, swirl the burlap ribbon throughout the magnolia leaves.


Add the mini gourds and the glittery leaves.  I used 10 gourds, but 15 would have been better.


I know that the magnolia swallowed up the base of the center arrangement – but I didn’t care – because the magnolia was so pretty.


The finished table

Three things I did after the party…

I couldn’t resist buying this red Glitter Paint.  It doesn’t go on very heavy, so I would suggest using a cheaper spray as a base coat, and then spray this as a top coat.  Love this for Christmas!
LOVE this Krylon Glitter Blast spray paint for Christmas! (Cherry Bomb)

I dried and then spray-painted about seven tardiva hydrangea stems.  I put them in a vase with 3 dried pussy willow branches.
Tardiva hydrangea stems (dried, spray-painted) with dried pussy willow branches

After the magnolia dried, I spray-painted it and I love it!!  I will use it later this season.
Magnolia, dried and then spray-painted

Happy fall! 

...and that's my 2 cents' worth, Cheryl


To subscribe to this blog (receive e-mail notification when there is a new post), e-mail Cheryls2CentsWorth@gmail.com and write “Subscribe” in the Subject line. Thanks! To stop receiving e-mail notifications, write “Unsubscribe” in the Subject line.

“Like" my Facebook Page by clicking this link and then clicking the "Like" button:   http://www.facebook.com/Cheryls2CentsWorth


Home page of my blog:  http://www.Cheryls2CentsWorth.blogspot.com